
Home Grow Guide
A Beginner’s Guide to Growing Gourmet Oyster Mushrooms at Home
Ten Mile Mushrooms · November 2, 2026
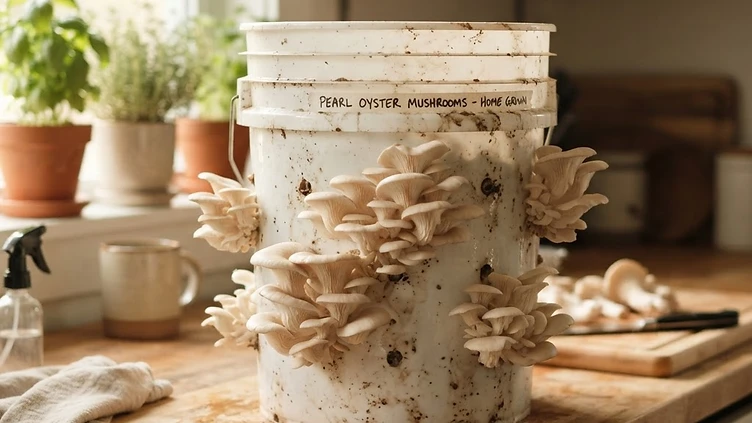
Discover the rewarding simplicity of cultivating your own gourmet oyster mushrooms at home with this step-by-step guide from Ten Mile Mushrooms.
Why Start with Oyster Mushrooms?
For those new to the world of mycology, oyster mushrooms (Pleurotus ostreatus) are the perfect introduction. They are vigorous, fast-growing, and remarkably forgiving, making them an ideal choice for home growers. Unlike many other species, oysters are aggressive colonizers, meaning they can outcompete potential contaminants, giving you a higher chance of a successful harvest on your first try.
Gathering Your Supplies
You don’t need a laboratory to grow mushrooms. To get started, you will need:
- Grain Spawn: This is your "seed" material—sterilized grain fully colonized with healthy mushroom mycelium.
- Substrate: Oysters are saprotrophs, meaning they feed on dead organic matter. Common, accessible substrates include chopped straw, hardwood sawdust, or even shredded cardboard.
- Container: A clean 5-gallon bucket with holes drilled into the sides or a simple plastic bag works perfectly.
Step-by-Step Cultivation
1. Prepare Your Substrate: If using straw, ensure it is clean and hydrated. Many growers choose to pasteurize their substrate by soaking it in hot water to reduce competing microbes, though some substrates like cardboard require less preparation.
2. Inoculation: Mix your grain spawn thoroughly into your prepared substrate. The goal is to distribute the mycelium evenly so it can begin colonizing the material as quickly as possible.
3. The Colonization Phase: Pack your mixture into your container. Place it in a warm, dark, and draft-free area (ideally 65–75°F). Over the next two to three weeks, you will see white, thread-like mycelium spread throughout the substrate. Once the material is fully white, it is ready to fruit.
4. Triggering Fruiting: Move your container to a well-lit room, avoiding direct sunlight. Introduce fresh air and maintain high humidity (80–90%). If using a bucket or bag, the mushrooms will begin to pin and emerge from the holes you created. Mist the area around the holes several times a day to keep the developing mushrooms hydrated.
Common Mistakes to Avoid
- Over-misting: While mushrooms love humidity, avoid soaking the substrate directly, which can lead to rot.
- Poor Airflow: Mushrooms need to breathe. If your mushrooms look like they have long, thin stems and tiny caps, they are likely reaching for more fresh air.
- Direct Sunlight: Keep your grow away from harsh, direct sun, which can dry out the delicate pins before they have a chance to mature.
Harvest your mushrooms by twisting them off the cluster when the edges of the caps begin to flatten or slightly curl upward. With a little patience, you’ll be enjoying farm-fresh, gourmet mushrooms right from your own kitchen.
